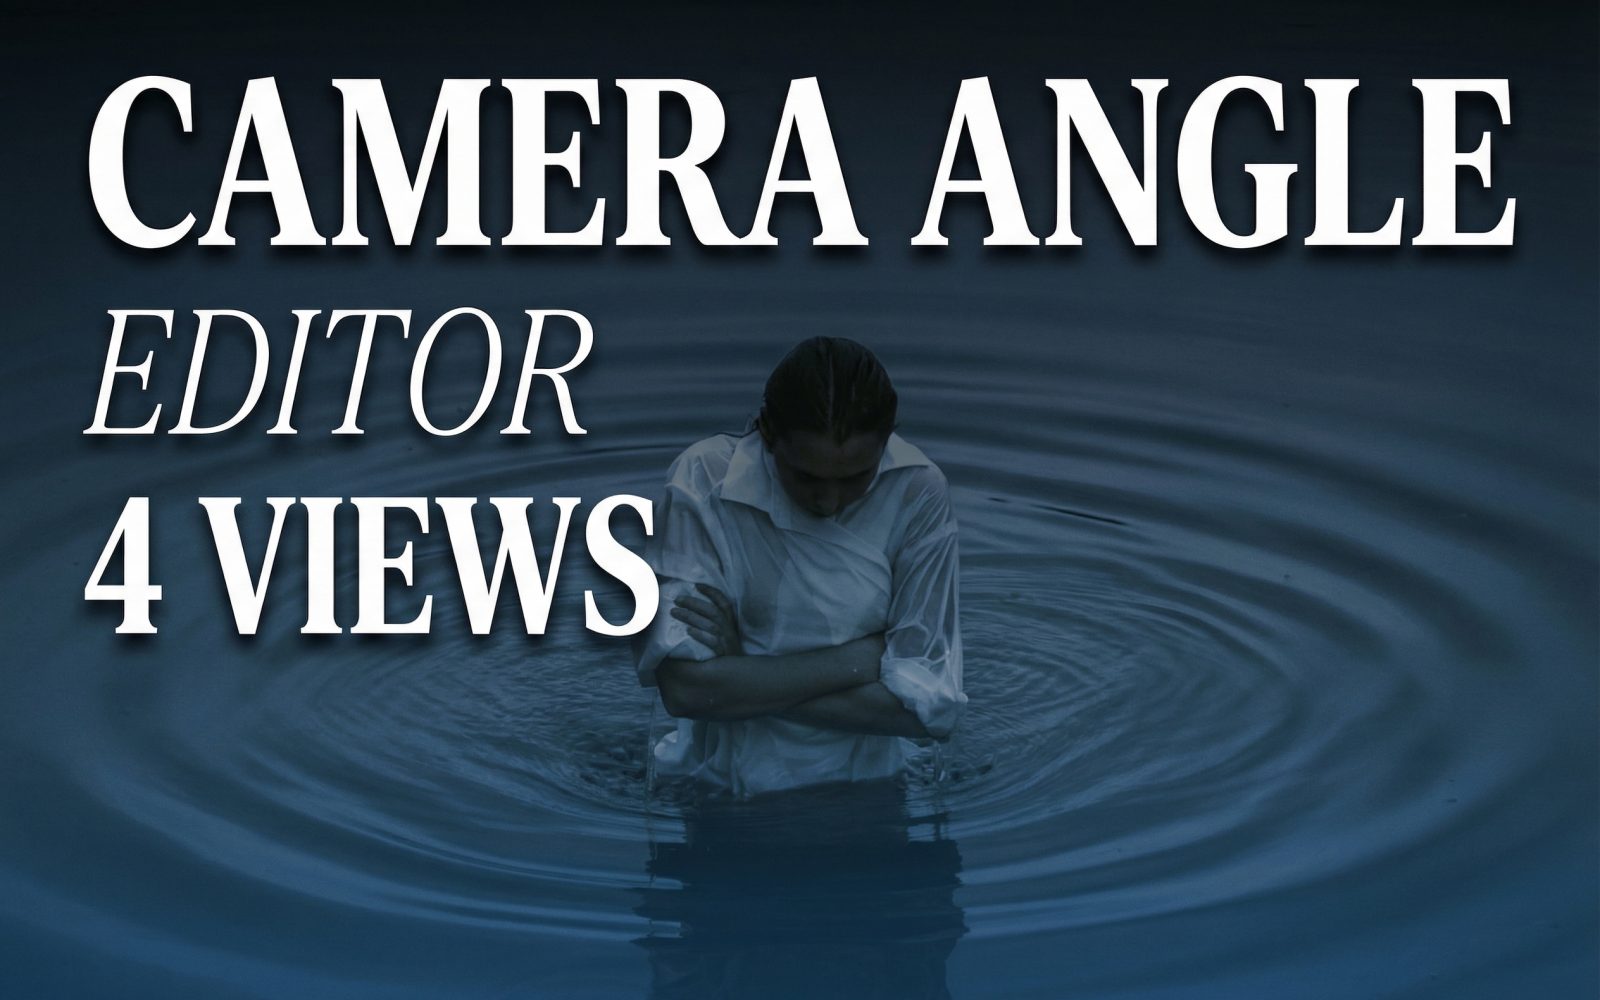
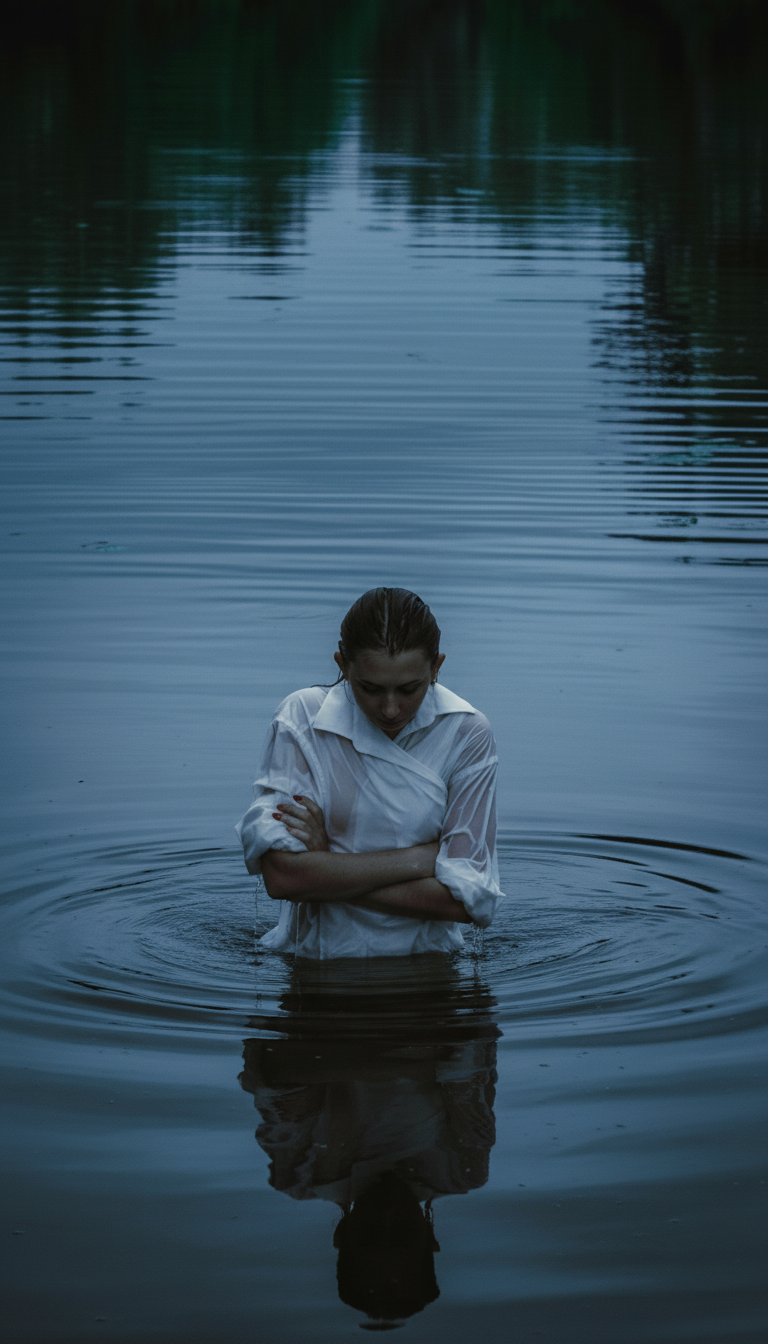
Camera Angle Editor takes one image and synthesizes a new viewpoint instead of merely cropping it. This test asks a narrow question: can a single portrait keep its subject, clothing, waterline, reflections, and scene mood coherent while the apparent camera moves? The source is a low-light portrait of a person standing chest-deep in a lake, wearing a white shirt with folded arms. It is a useful stress case because the model has to infer hidden body geometry while preserving ripples and a dark mirrored reflection.
What this Camera Angle Editor test checks
The test uses one existing input and four viewpoint settings: front, left-side, three-quarter, and top-down. No text prompt, mask, retouching, or manual correction was added. Each result is judged against the same practical checks: facial and body placement, shirt structure, the arm overlap, circular ripples, reflection shape, and whether the background still reads as one lake rather than a pasted backdrop.
The available control is deliberately simple. wiro/camera-angle-editor accepts an inputImage and an angle selection. The documented choices include front, back, both side views, top-down, bottom, three-quarter, eye-level, high-angle, low-angle, isometric, and diagonal. This post uses the four settings above because they move progressively farther from the source composition without changing the subject or scene.
What the four outputs actually show
1. Front view: a baseline rather than a new shot
angle=front. This is the baseline image used to compare the stronger viewpoint changes.The front setting keeps the centered composition, bowed head, folded arms, pale shirt, and broad reflection. Because this output matches the source framing, it does not prove that the model can reconstruct an unseen side. It does show the reference look that the later images need to preserve: cool blue water, a dark treeline, and rings spreading around the torso.
2. Left-side view: the clearest proof of viewpoint synthesis
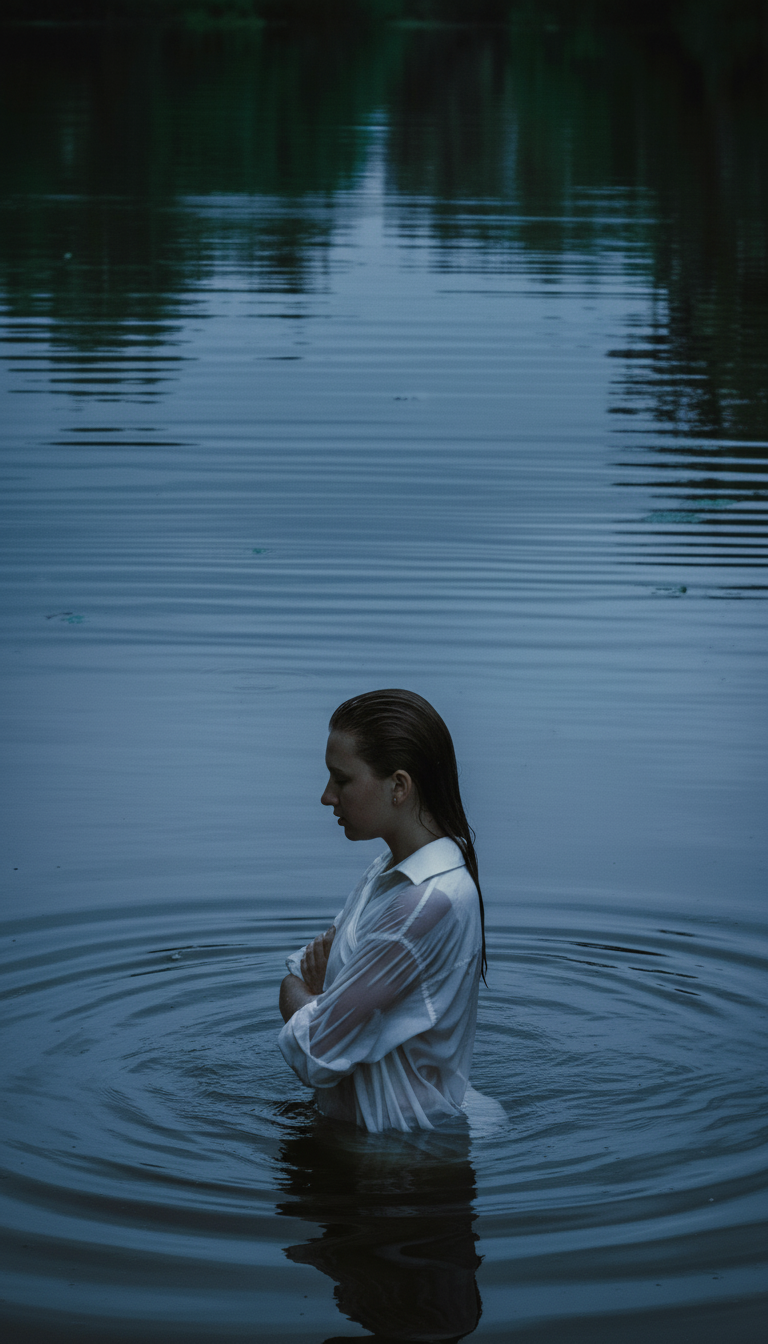
angle=left-side. The subject shifts into a readable profile while the lake setting remains consistent.The left-side result changes the face into profile and turns the shirt and crossed arms with it. The side of the torso has to be invented here, so this is the most informative output in the set. The wet hair still trails down the back, and the waterline stays at roughly the same chest height. The reflection remains dark and vertical. The ripple pattern is less perfectly concentric than the baseline, but it still looks connected to the body rather than floating separately.
3. Three-quarter view: the strongest option for a natural alternate frame
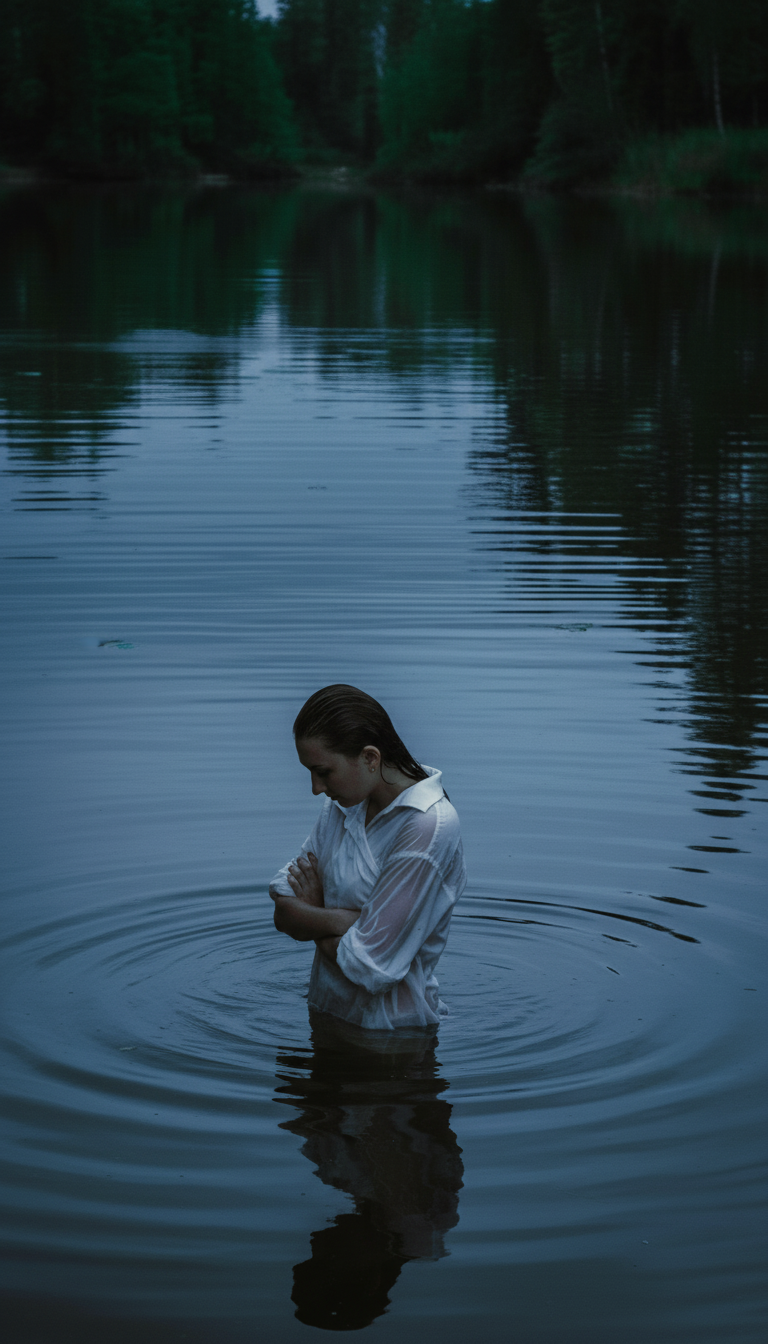
angle=three-quarter. The camera appears farther back and to the subject’s left, revealing more shoreline.The three-quarter result widens the scene and places the subject slightly lower in frame. It keeps the downward head pose and arm cross while exposing more of the distant lake and trees. This setting changes less than a pure profile, but that restraint helps. The subject still feels like the same person in the same clothing, and the reflected silhouette follows the new placement. For editorial portraits, product photography, or a second shot in a carousel, this is the safest alternate viewpoint in the four-image set.
4. Top-down: a harder geometry test
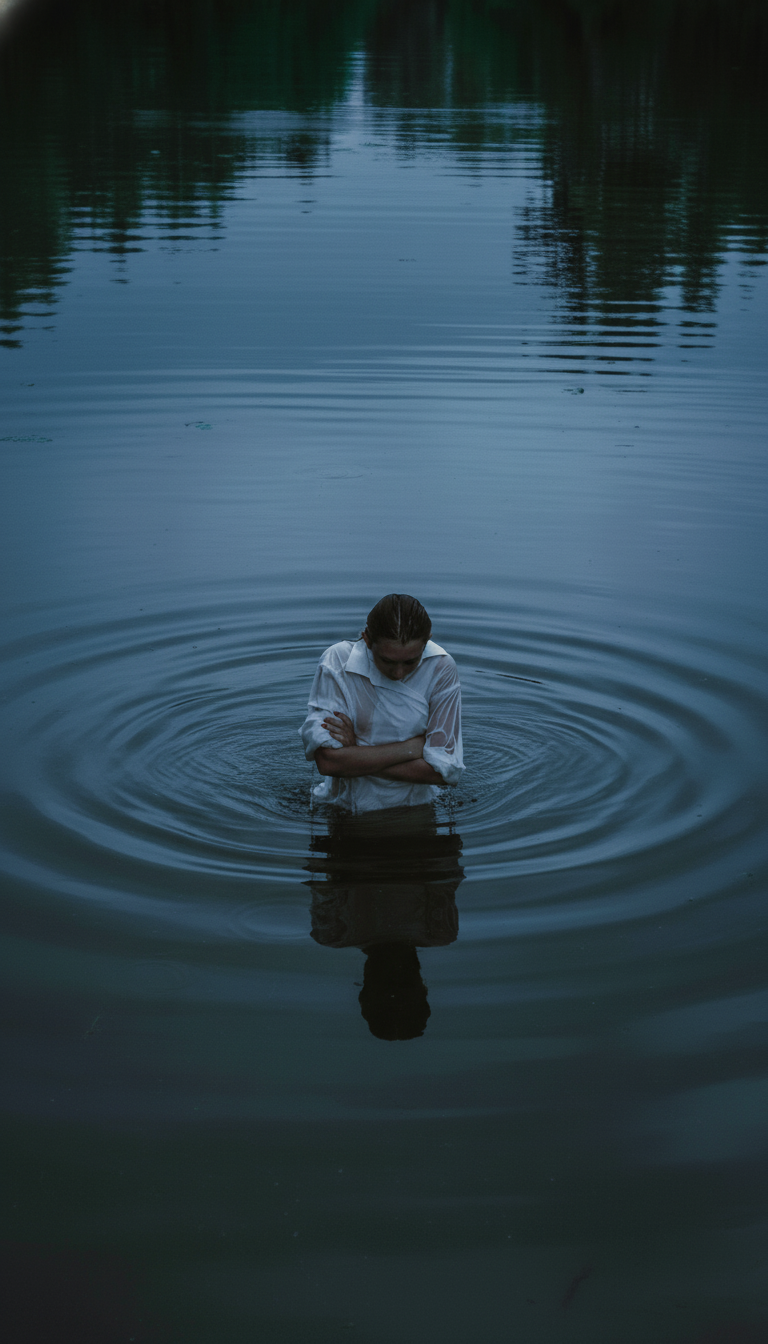
angle=top-down. The output looks down on the bowed subject and emphasizes the surrounding rings.The top-down setting pulls the camera above the subject and makes the ripple circles the dominant design element. The folded arms, head angle, shirt color, and central reflection survive the move. This is a harder request than the side view because it requires a different reading of shoulders, water surface, and distance. The output succeeds as a moody overhead composition, though it should not be treated as documentary geometry. For work that needs exact product dimensions or a faithful architectural perspective, a generated overhead view still needs human review.
Parameters, run time, and cost on Wiro
Each published result uses the same inputImage; only angle changes. The original post did not retain task IDs, so it cannot claim a measured run time or billed cost for these exact four files. The model documentation includes a task-detail example with elapsedseconds: 6.0000 between start and end, and a separate cancelled-task example lists totalcost: 0.003510000000. Those examples show what the service reports, not a promise for these outputs or a benchmark for every request. Queue time, input size, and service conditions can change the result.
| Output | angle value | Observed result | Measured time/cost for this file |
|---|---|---|---|
| Front | front |
Baseline composition retained | Not recorded |
| Left-side | left-side |
Readable profile and preserved waterline | Not recorded |
| Three-quarter | three-quarter |
Natural wider alternate frame | Not recorded |
| Top-down | top-down |
Convincing mood, less literal geometry | Not recorded |
When to pick Camera Angle Editor
Pick the front setting when the source already has the right composition and a consistent baseline is needed. Use left-side when a profile variation matters more than exact physical detail. Pick three-quarter for the most dependable second frame in a portrait, product, or social sequence. Reserve top-down for a graphic, atmospheric change where the viewer reads the image as a new composition, not as evidence of a real camera position.
For edits where framing matters more than viewpoint, see the AI image resizing guide. For broader before-and-after editing examples, read FireRed Image Edit vs Seedream V5 Lite and three product photo edit tests.
Run Camera Angle Editor on Wiro when a single still needs a believable second viewpoint, then inspect faces, hands, logos, repeated patterns, and water or glass before using the output in a final asset.