Virtual Try-On V2 was tested here to answer a practical question: how much control do the style, pose, framing, and aspect-ratio settings give a fashion team when the person and three garment references stay fixed? The six results below use the same model image and garment set. That makes the change in each output easier to attribute to the selected parameters rather than a new input.
The test uses Virtual Try-On V2 on Wiro. It accepts one human photo and up to 13 garment or accessory images. For this set, outputType was image for every run. No video was requested.
Test setup and what was held constant
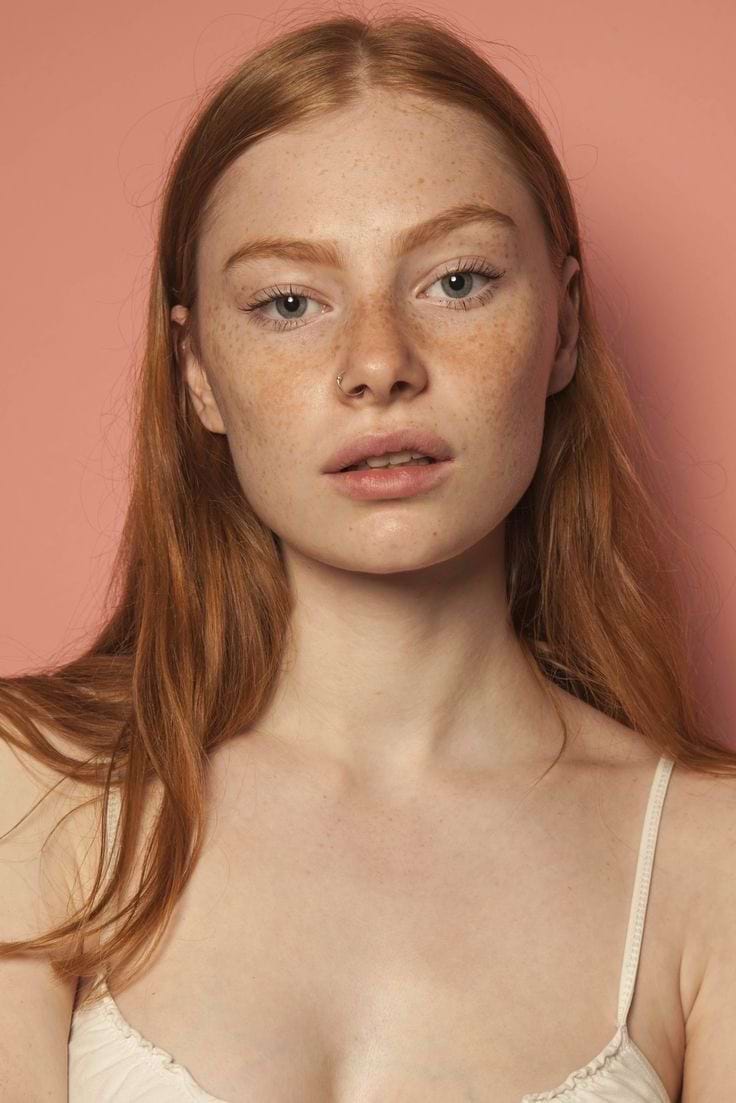
The source portrait, the three clothing references, and the requested outfit were unchanged across all six runs. The test intentionally varies only style, pose, plan, and ratio. This is a useful way to separate a setting that changes the scene from one that changes the crop. It is not a garment-sizing or identity-consistency benchmark.
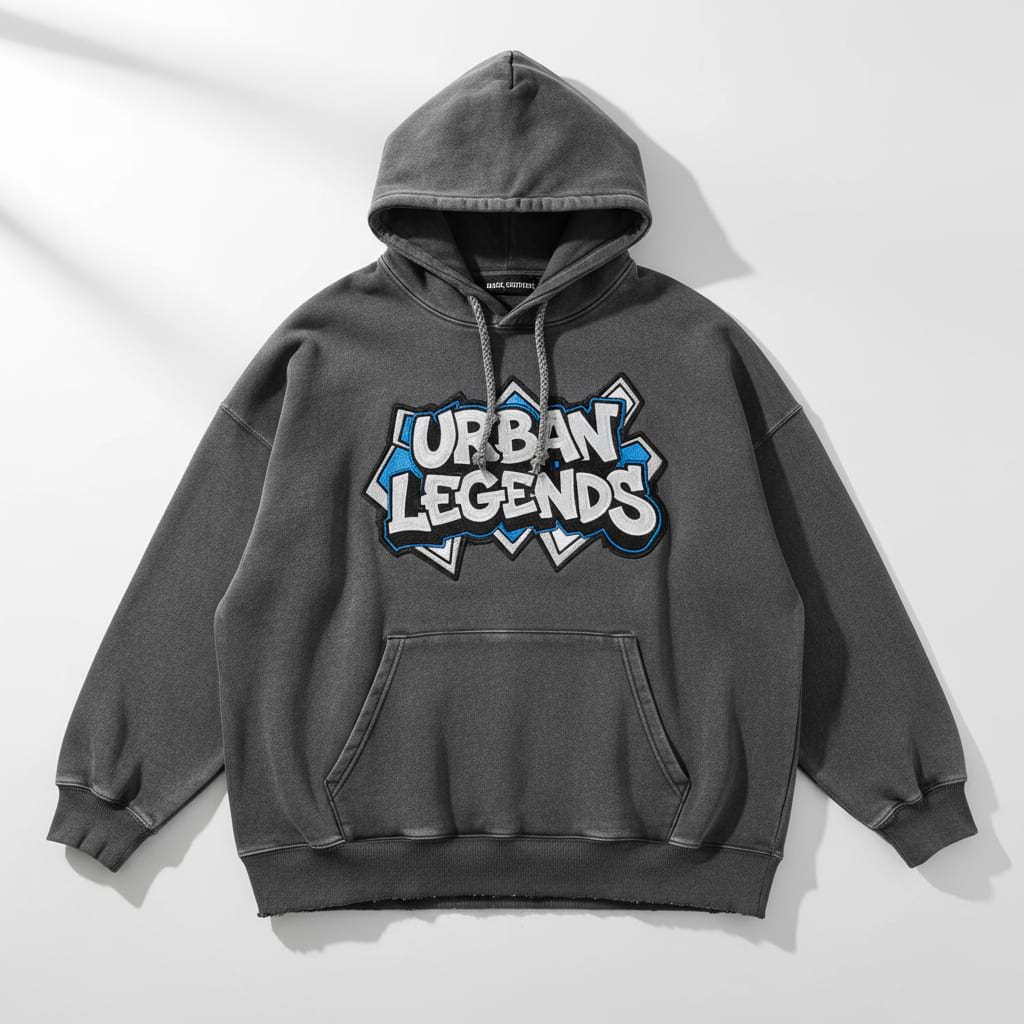
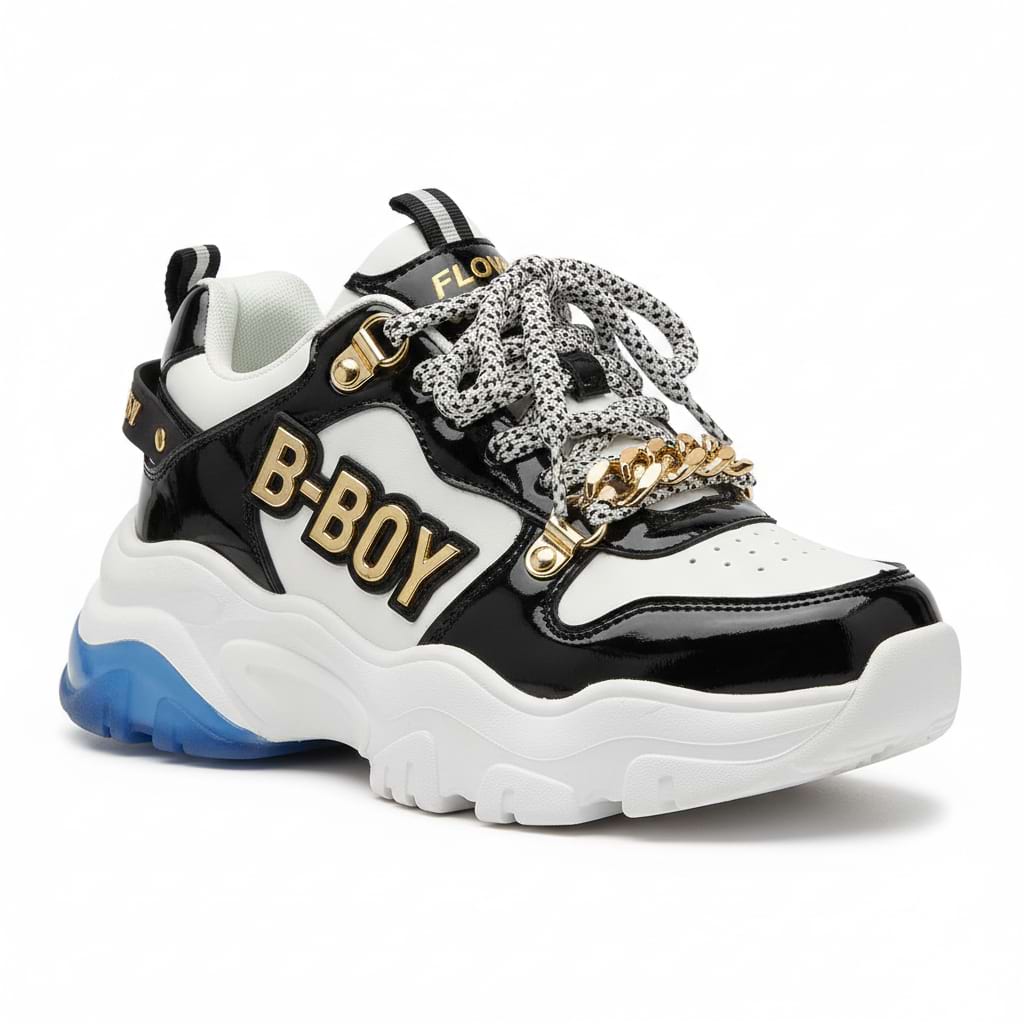
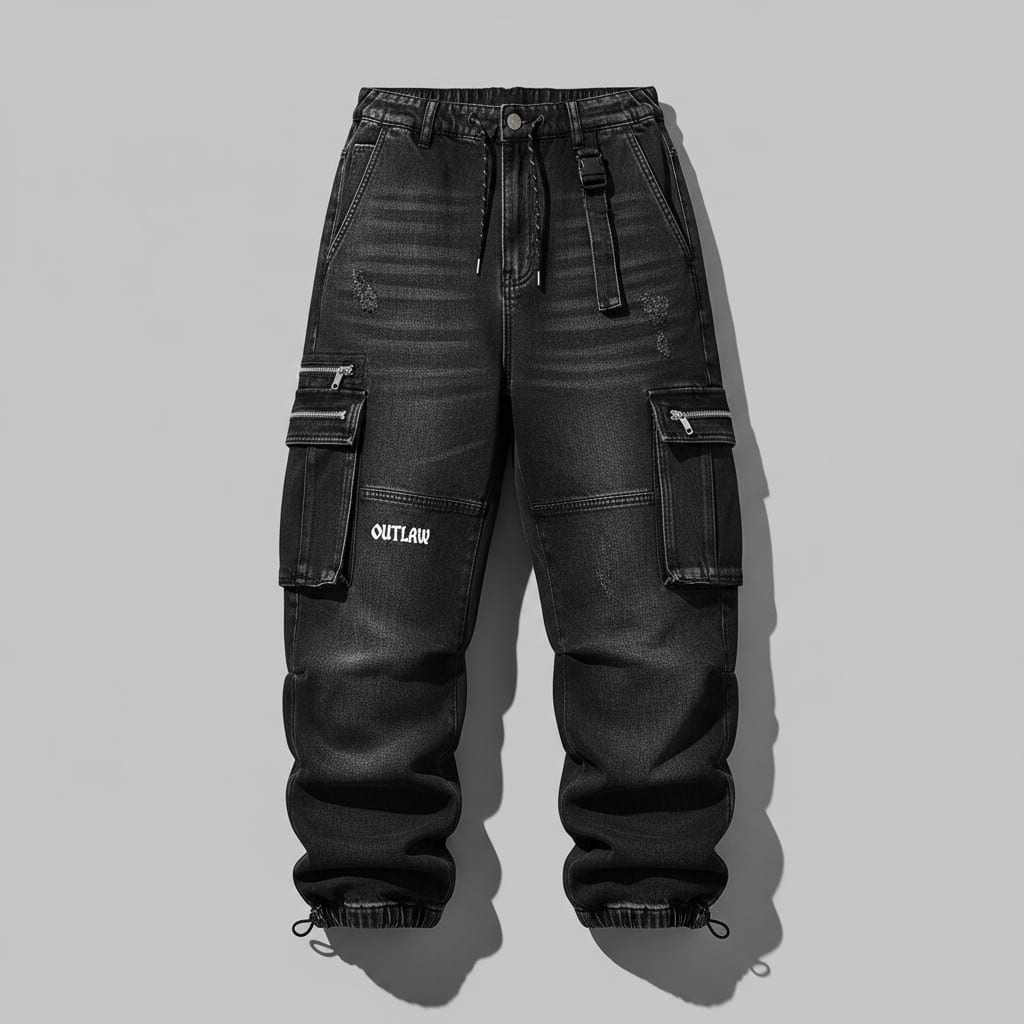
Virtual Try-On V2 results: six controlled outfit tests
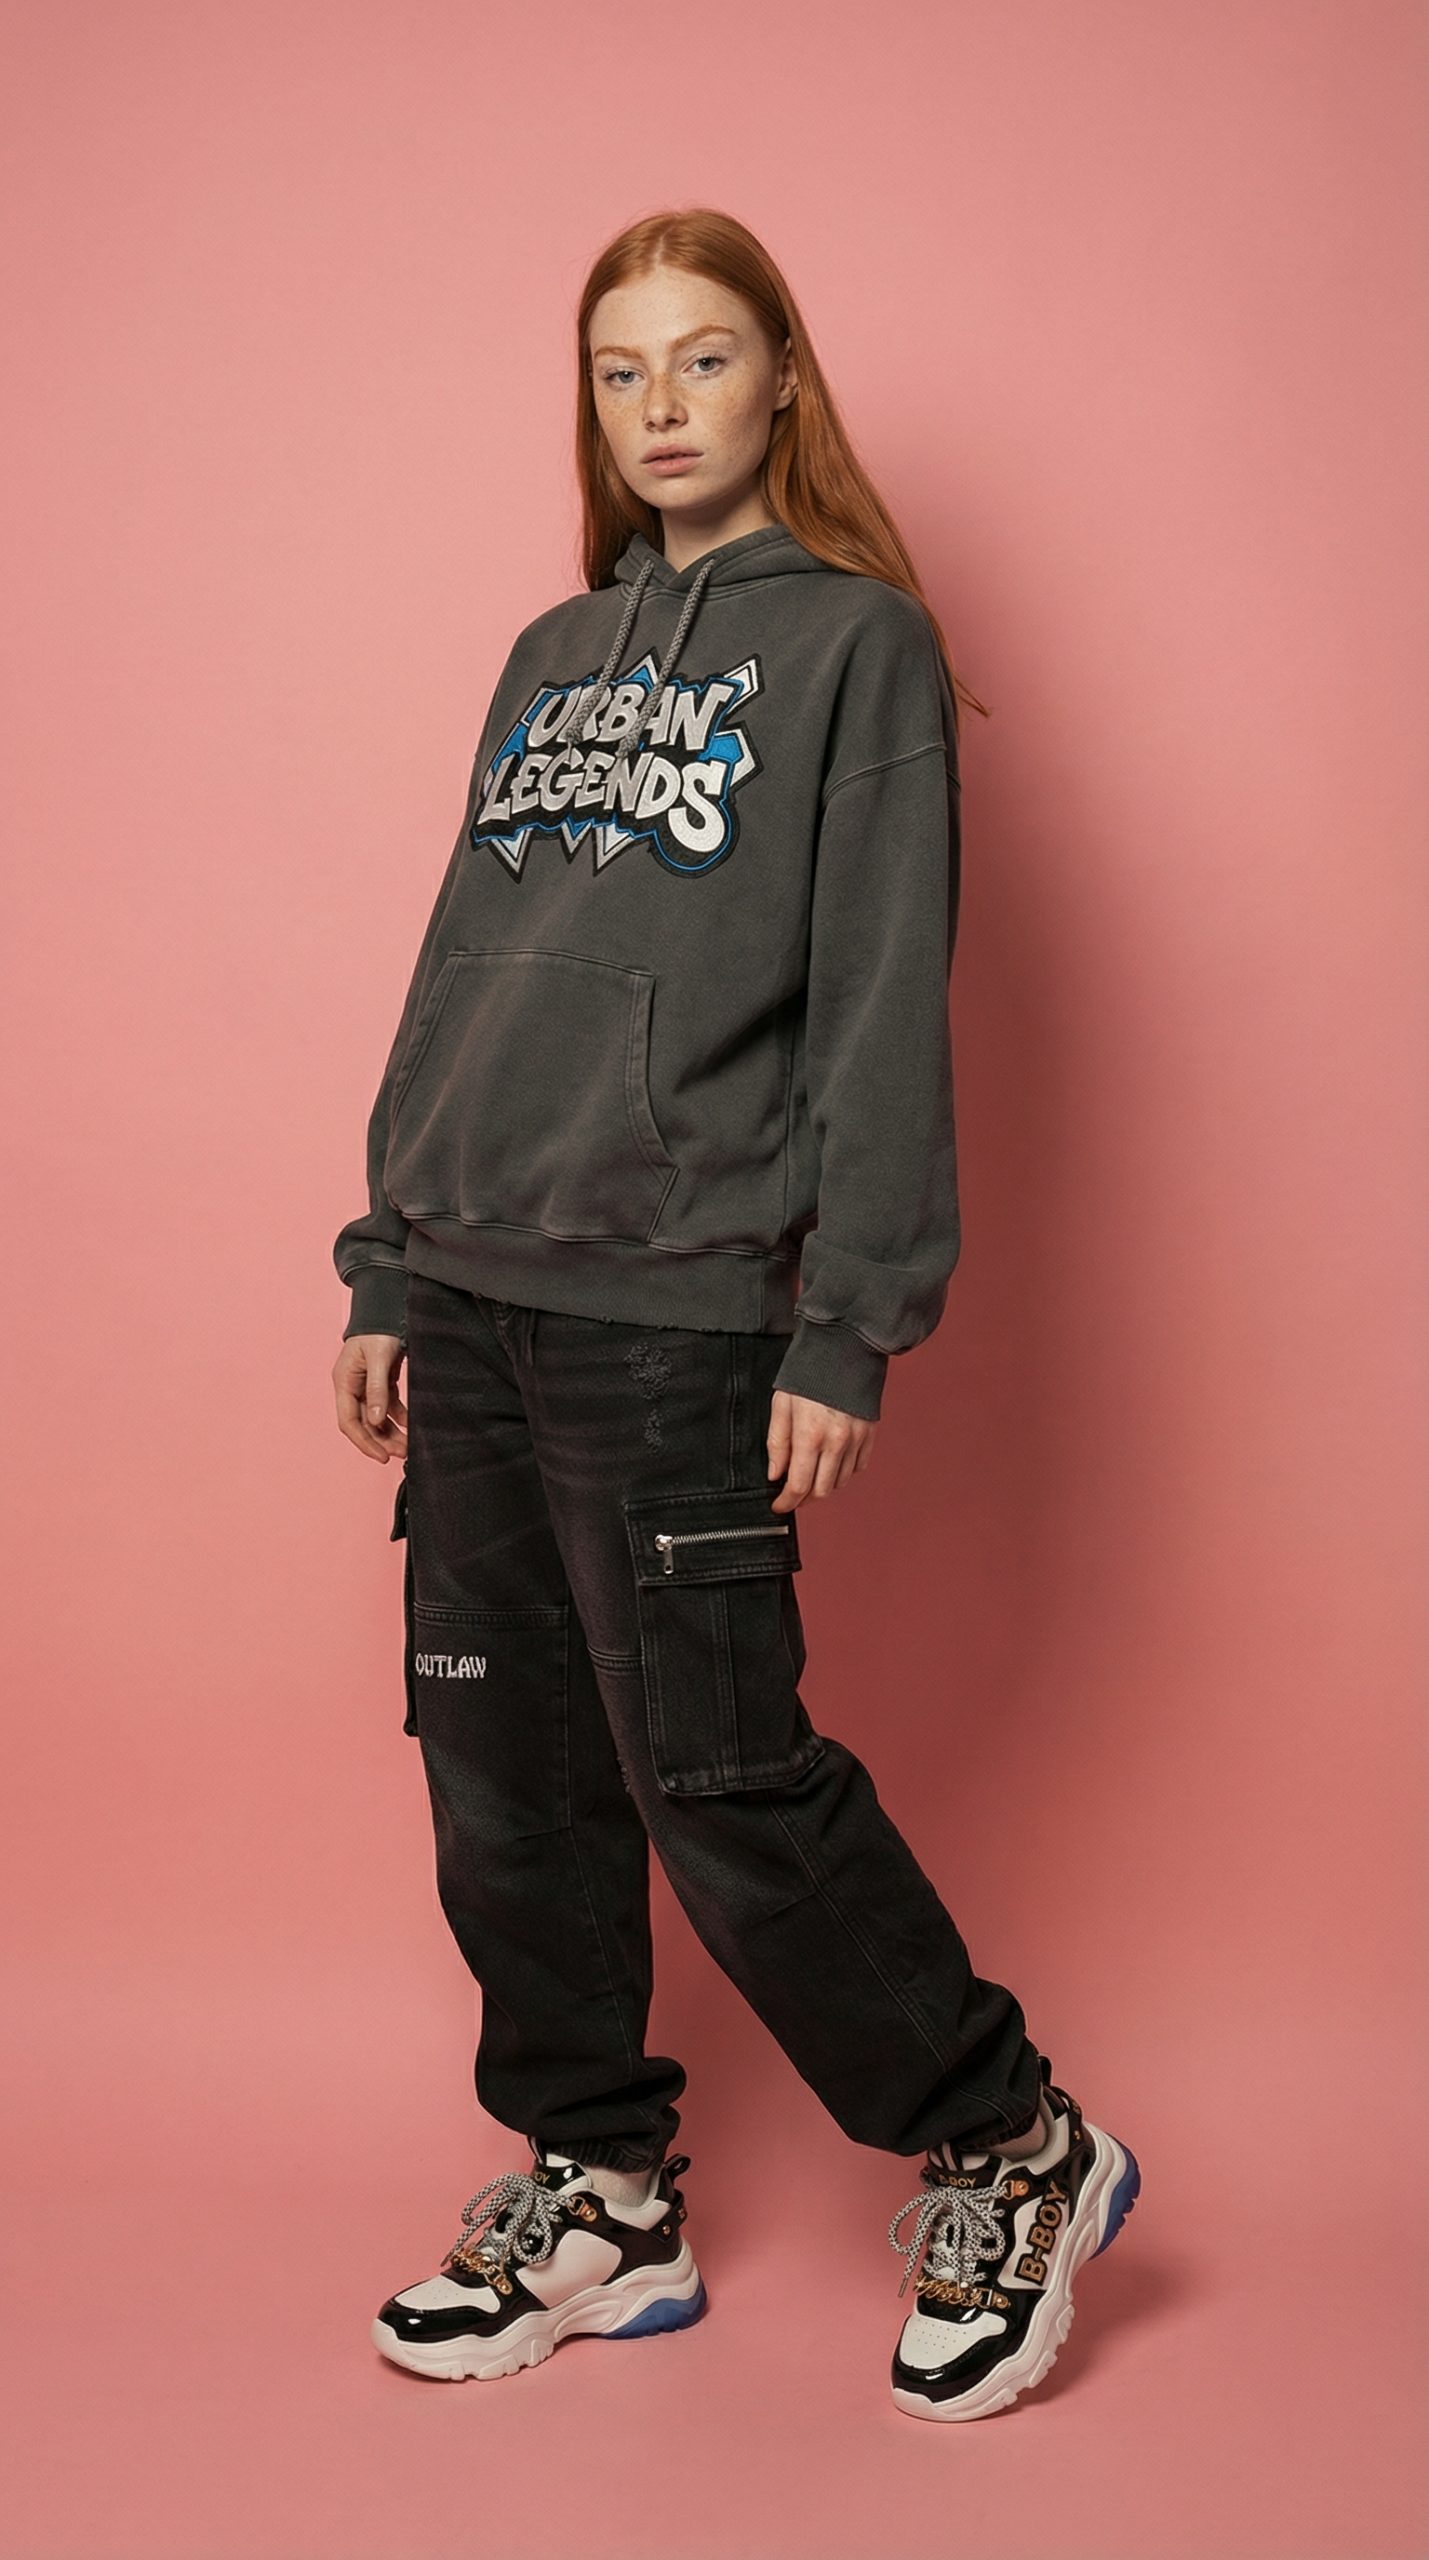
1. Original-scene standing portrait, 9:16
style=virtual-try-on, pose=standing, plan=wide-shot, ratio=9:16. The result keeps the pink backdrop and creates a full-body vertical fashion image. The charcoal hoodie, black cargo trousers, and chunky sneakers are all visible. The chest graphic remains legible enough to read as a graphic treatment, although lettering is never a safe detail to approve from a generated try-on. This is the best choice when the supplied scene matters and a short-form vertical crop is needed.
|
|
 |
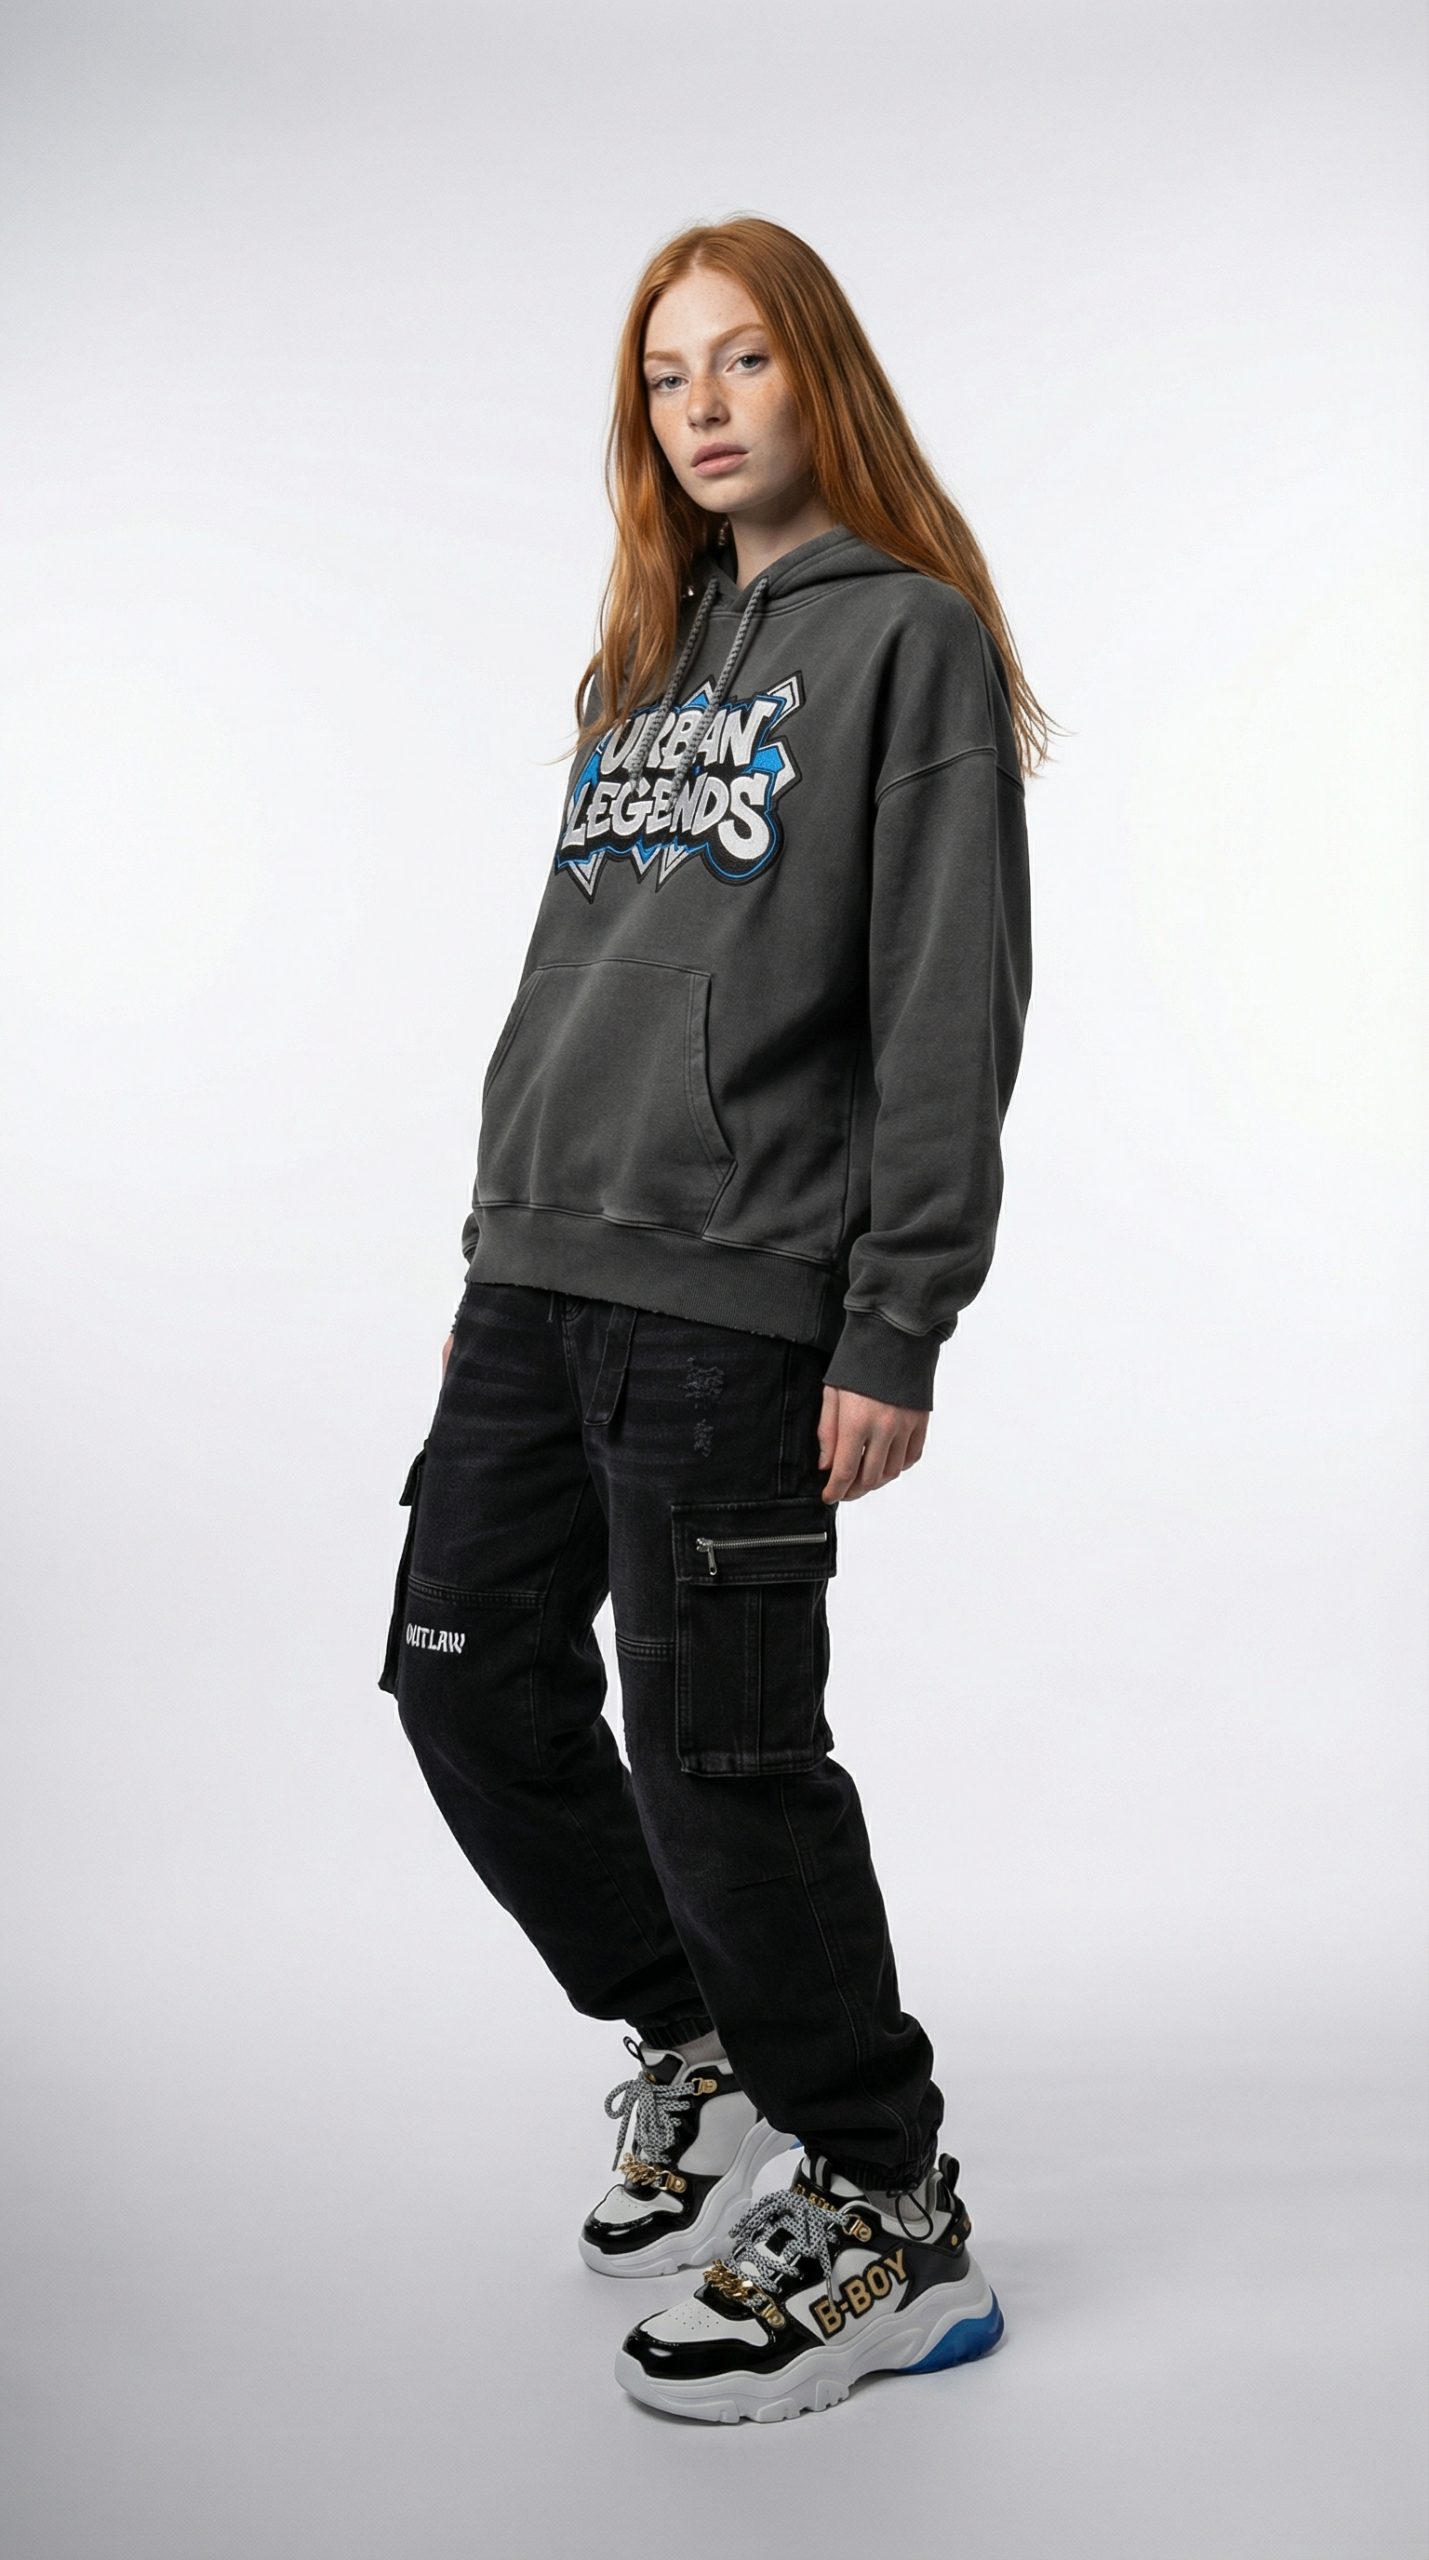
2. Studio standing portrait, 9:16
style=studio, pose=standing, plan=wide-shot, ratio=9:16. The outfit stays close to the first result, while the model moves to a neutral light studio background. The pose is more fashion-editorial, with the weight shifted through the legs. This setting makes the garment outline easy to inspect, especially the sleeves, hood, cargo pockets, and shoes. Pick it for a clean catalog-like asset when the original setting is disposable.
|
|
 |
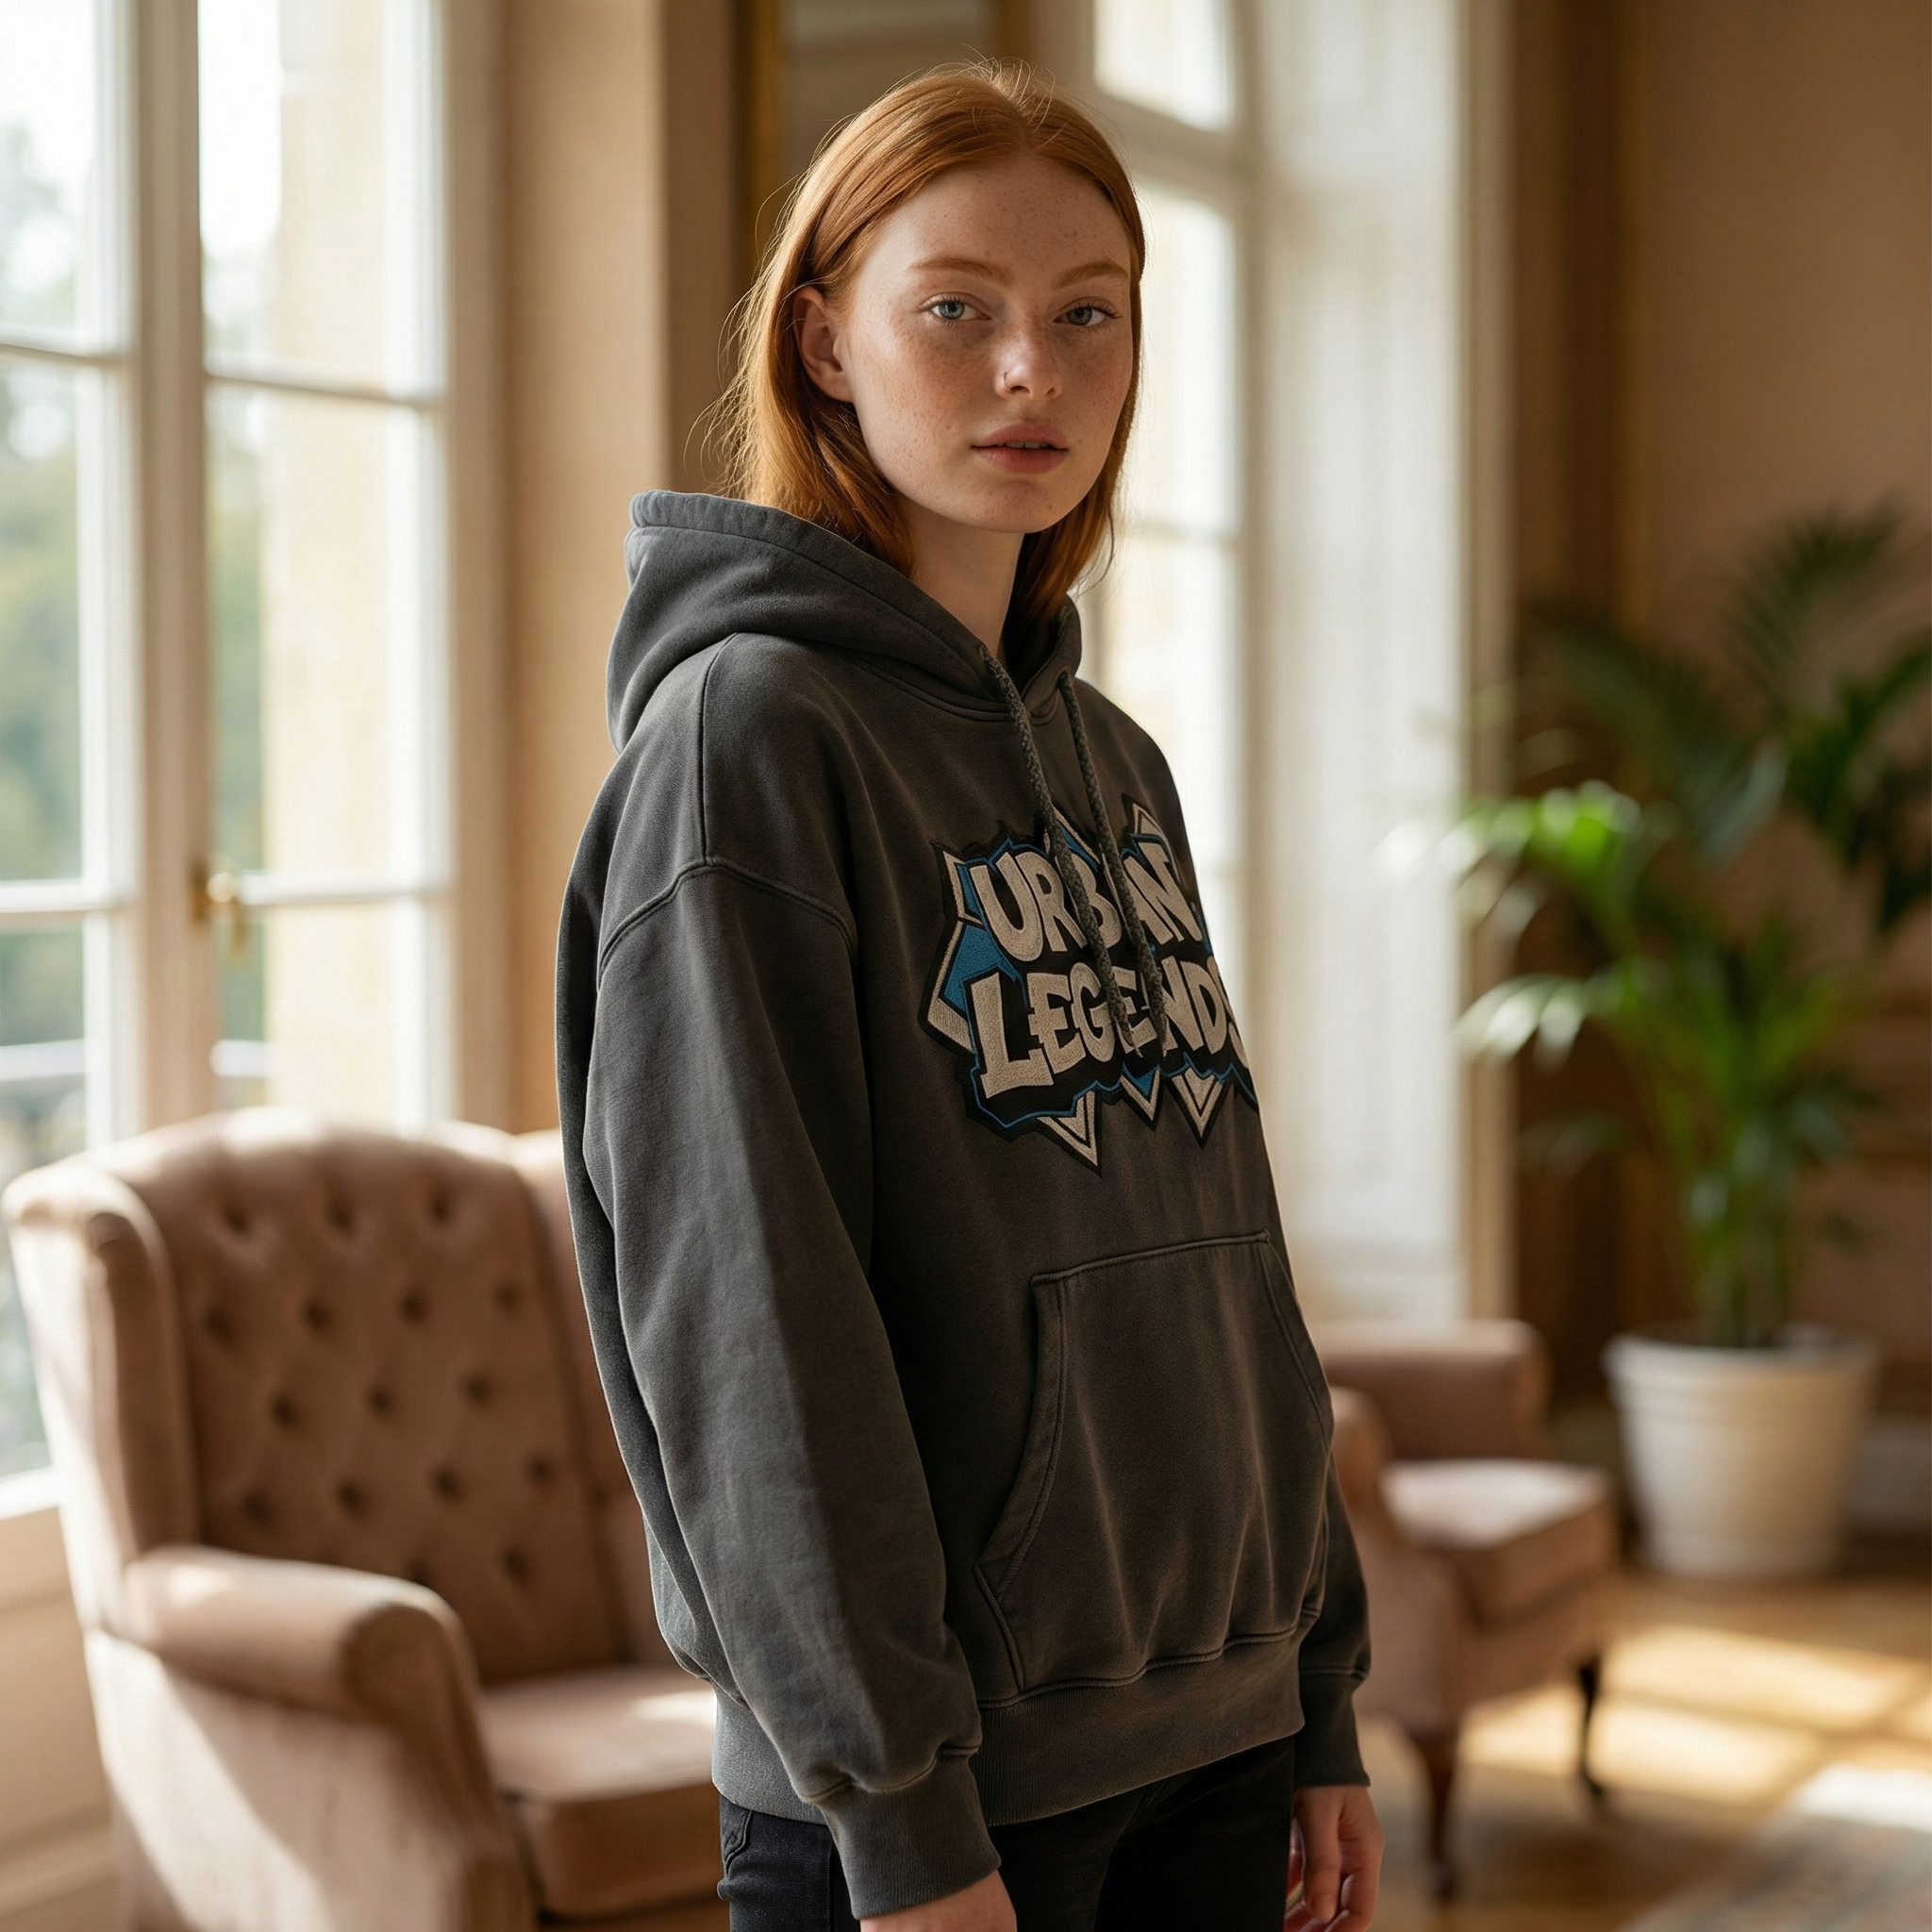
3. Indoor lifestyle crop, 1:1
style=indoor, pose=standing, plan=medium-shot, ratio=1:1. This square output puts the hoodie front and center in a warm room with window light, a chair, and a plant. It works as a lifestyle product image for a top because the chest, sleeves, and kangaroo pocket fill the frame. It does not verify the full outfit: the lower legs and sneakers are out of frame. That matches the model documentation warning that medium shots ignore lower-body items.
|
|
 |
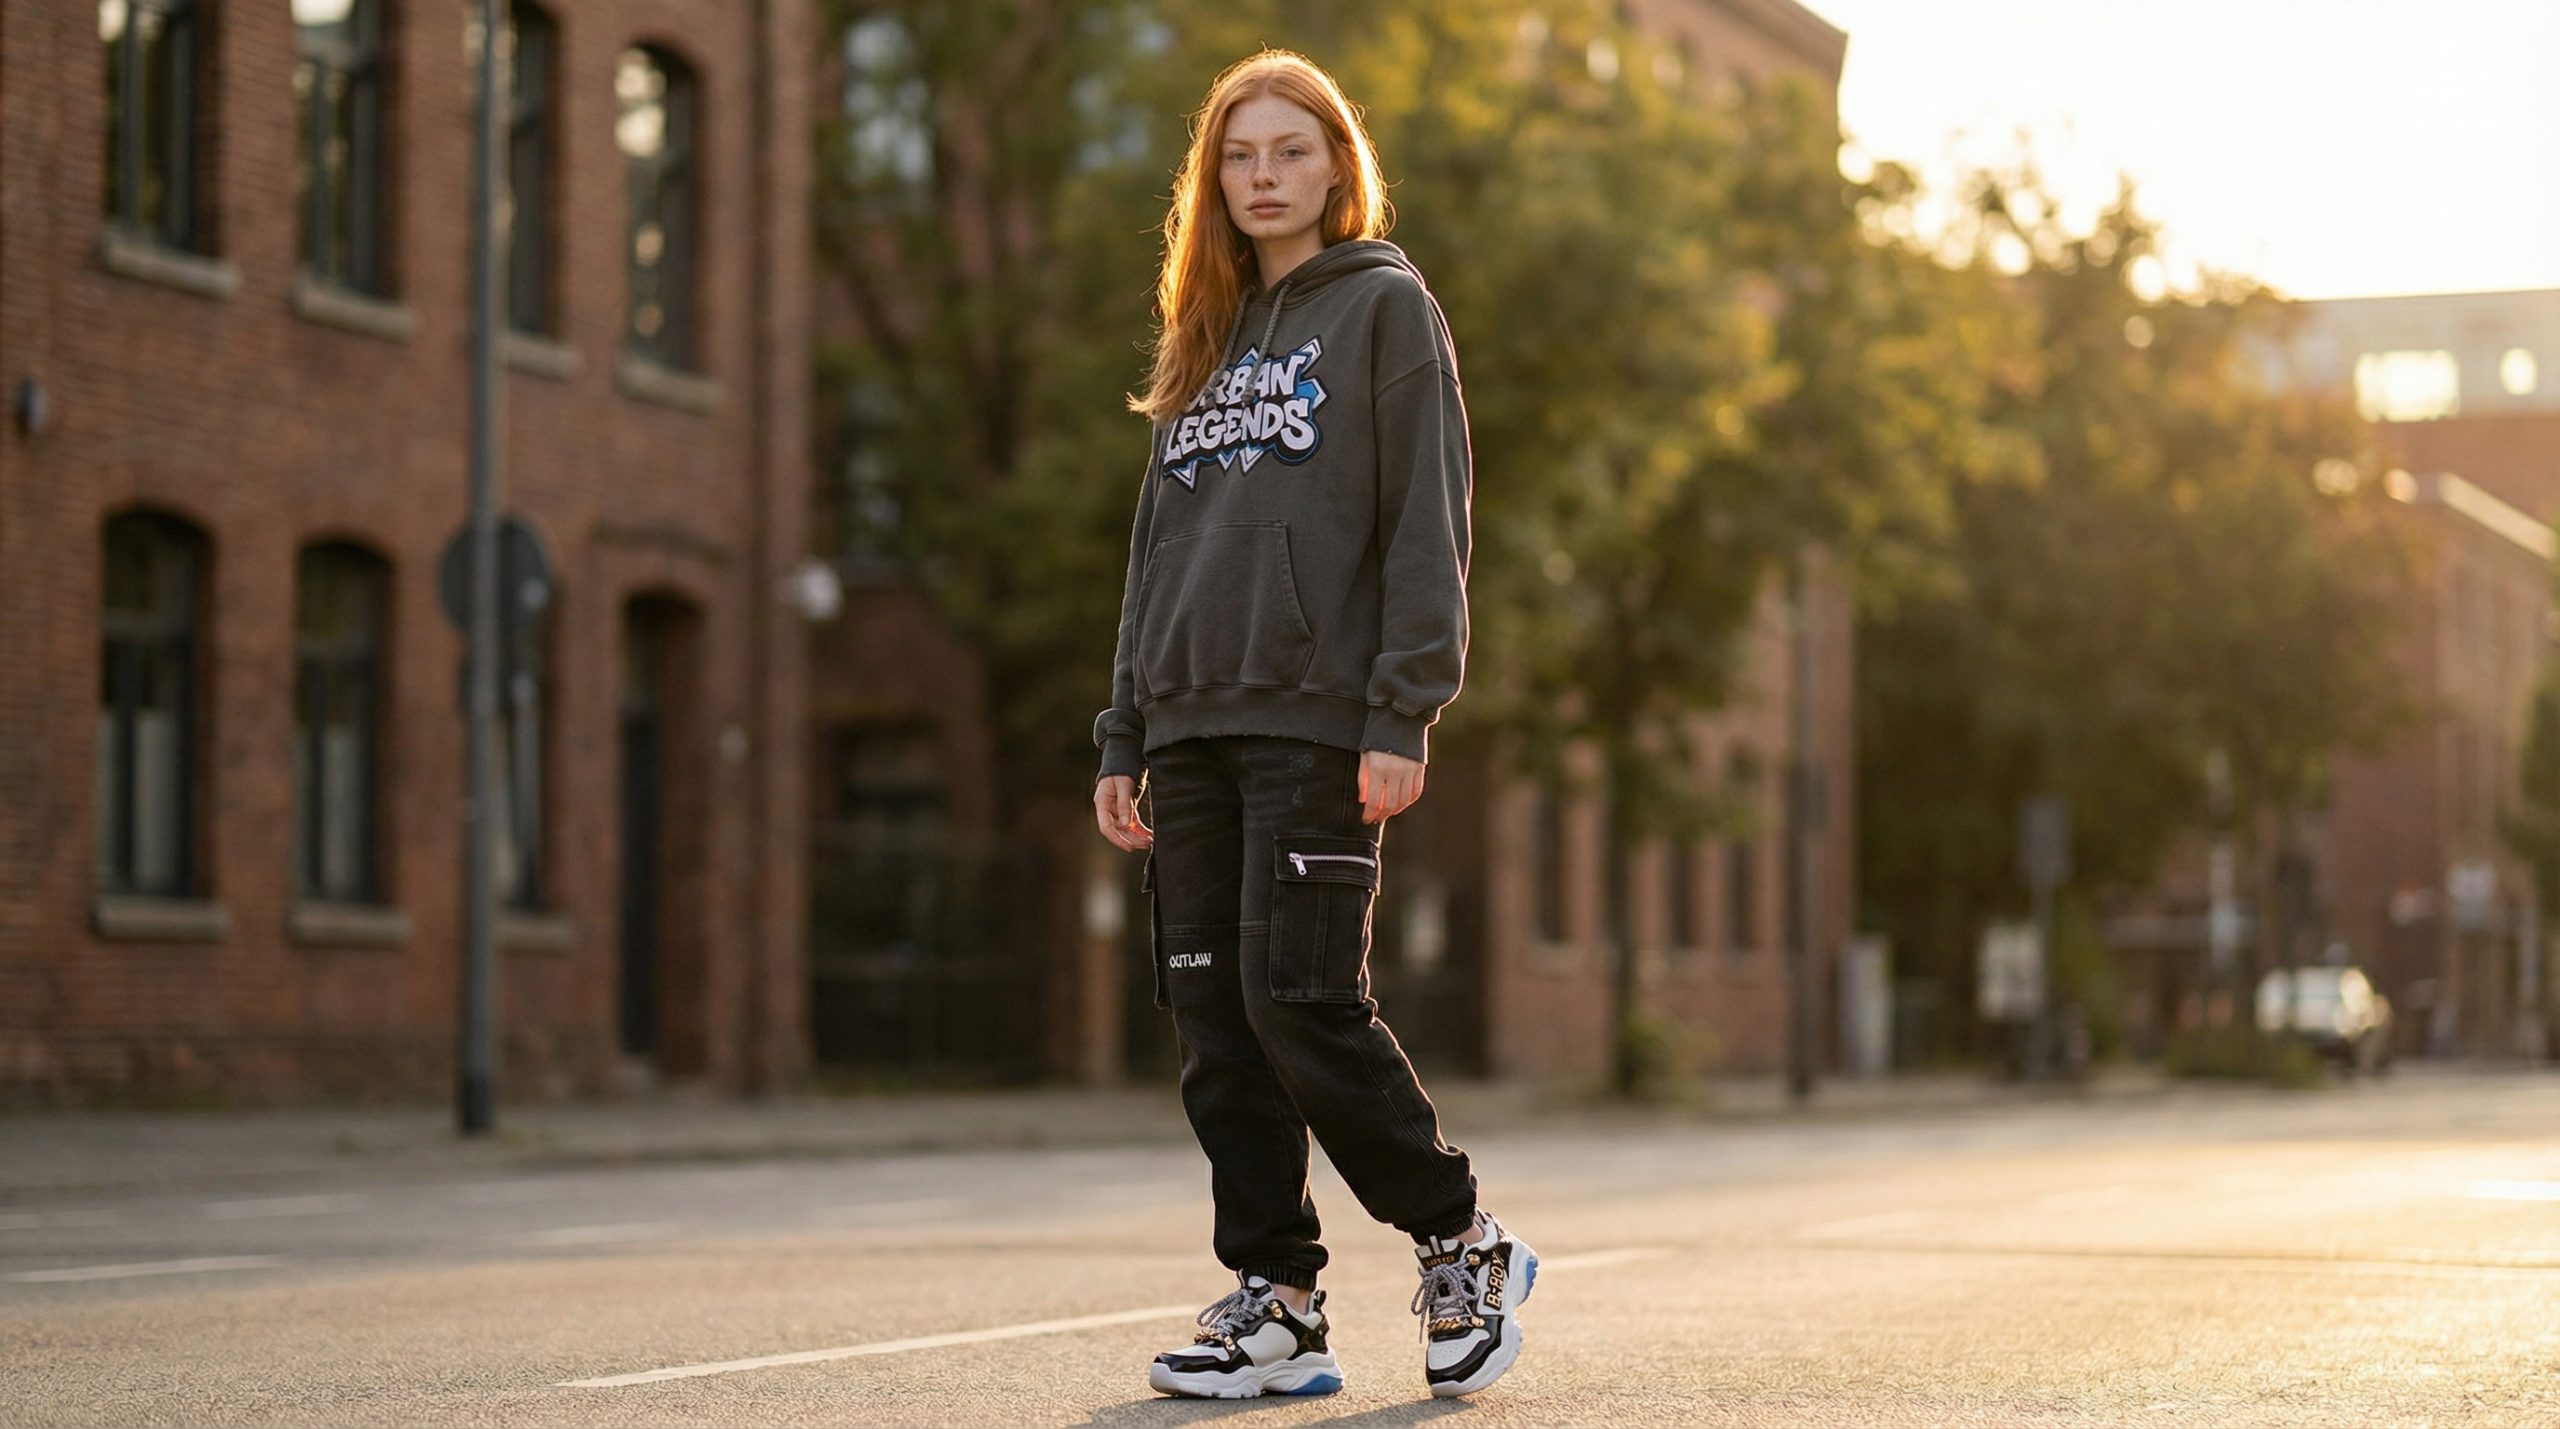
4. Outdoor wide shot, 16:9
style=outdoor, pose=standing, plan=wide-shot, ratio=16:9. The output places the full outfit on a sunlit street, with the person smaller in the landscape frame. The hoodie graphic and cargo silhouette still read, but small construction details are less useful at this distance. Choose this setting for a website banner, lookbook header, or social landscape placement. It is a weak choice for a product-detail-page image where shoppers need to inspect the garment.
|
|
 |
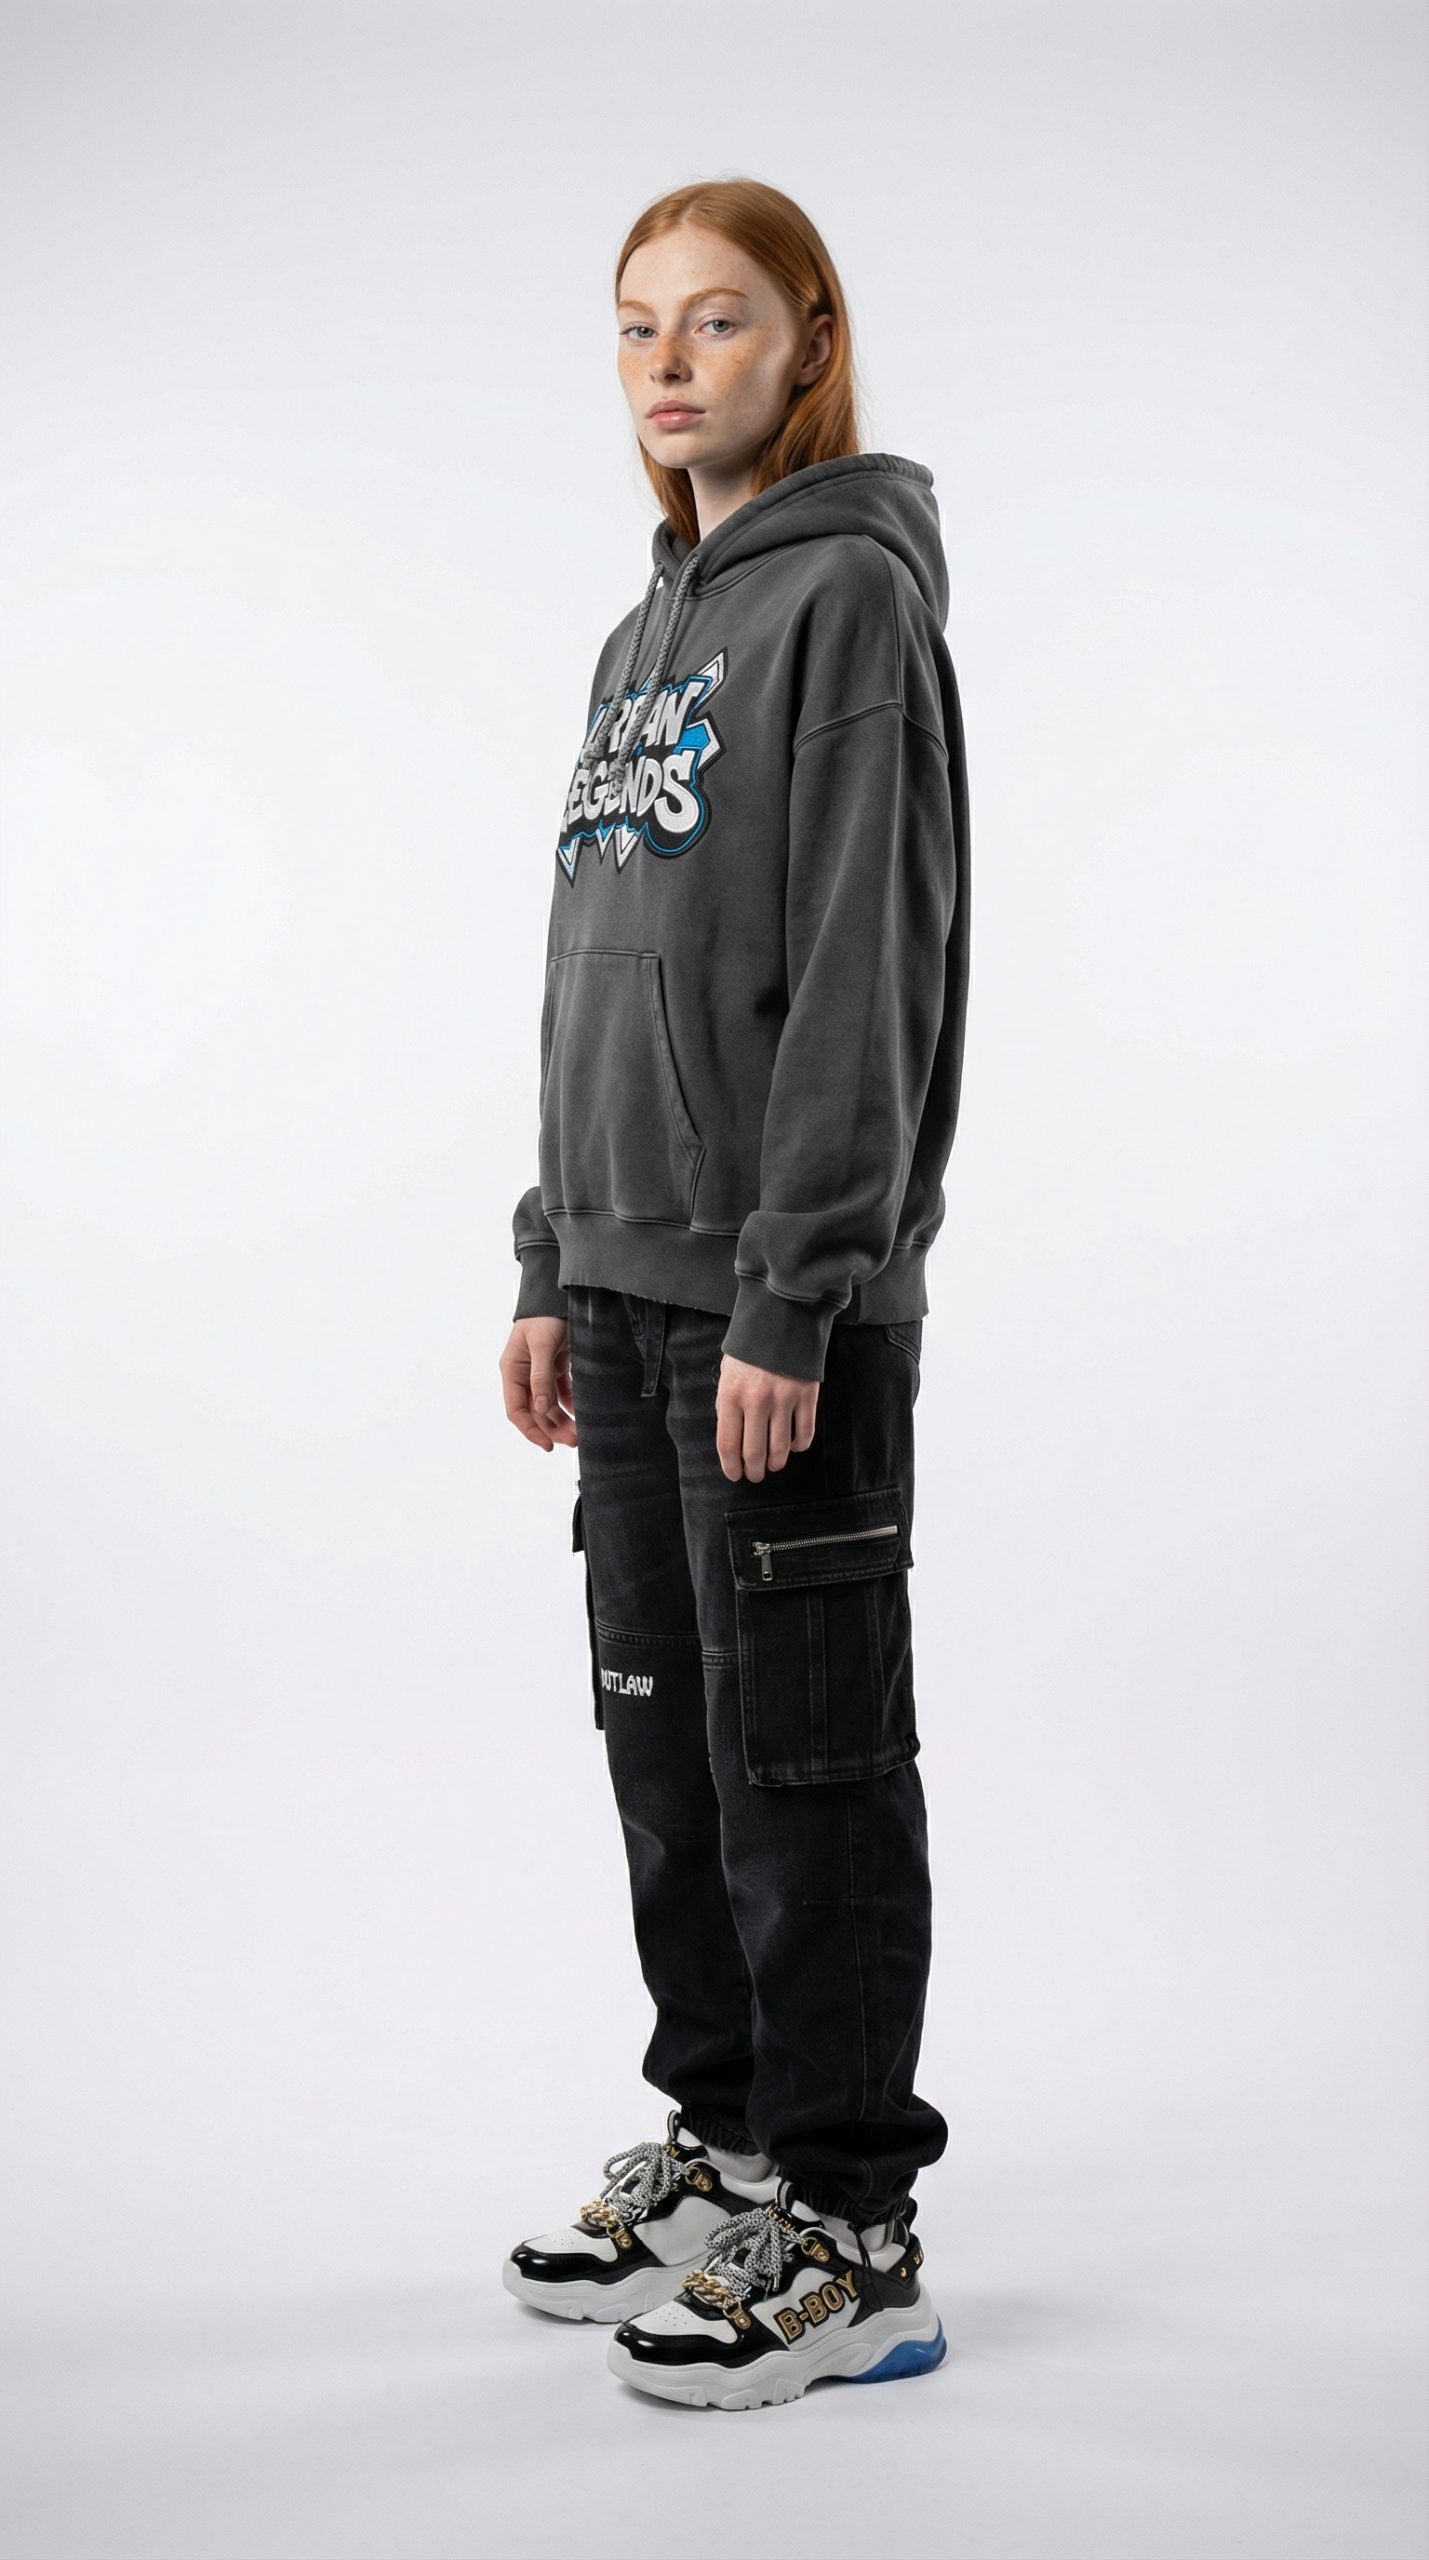
5. Studio side profile, 9:16
style=studio, pose=side-profile, plan=wide-shot, ratio=9:16. This is the stricter shape test. The image shows the hoodie drape from a three-quarter side angle and preserves the trousers, pocket placement, and shoes in a full-body crop. The body is not a pure profile, so teams that need an exact side-on product view should run more than one candidate. Still, this is the strongest option here for checking sleeve volume and silhouette away from a straight-on pose.
|
|
 |
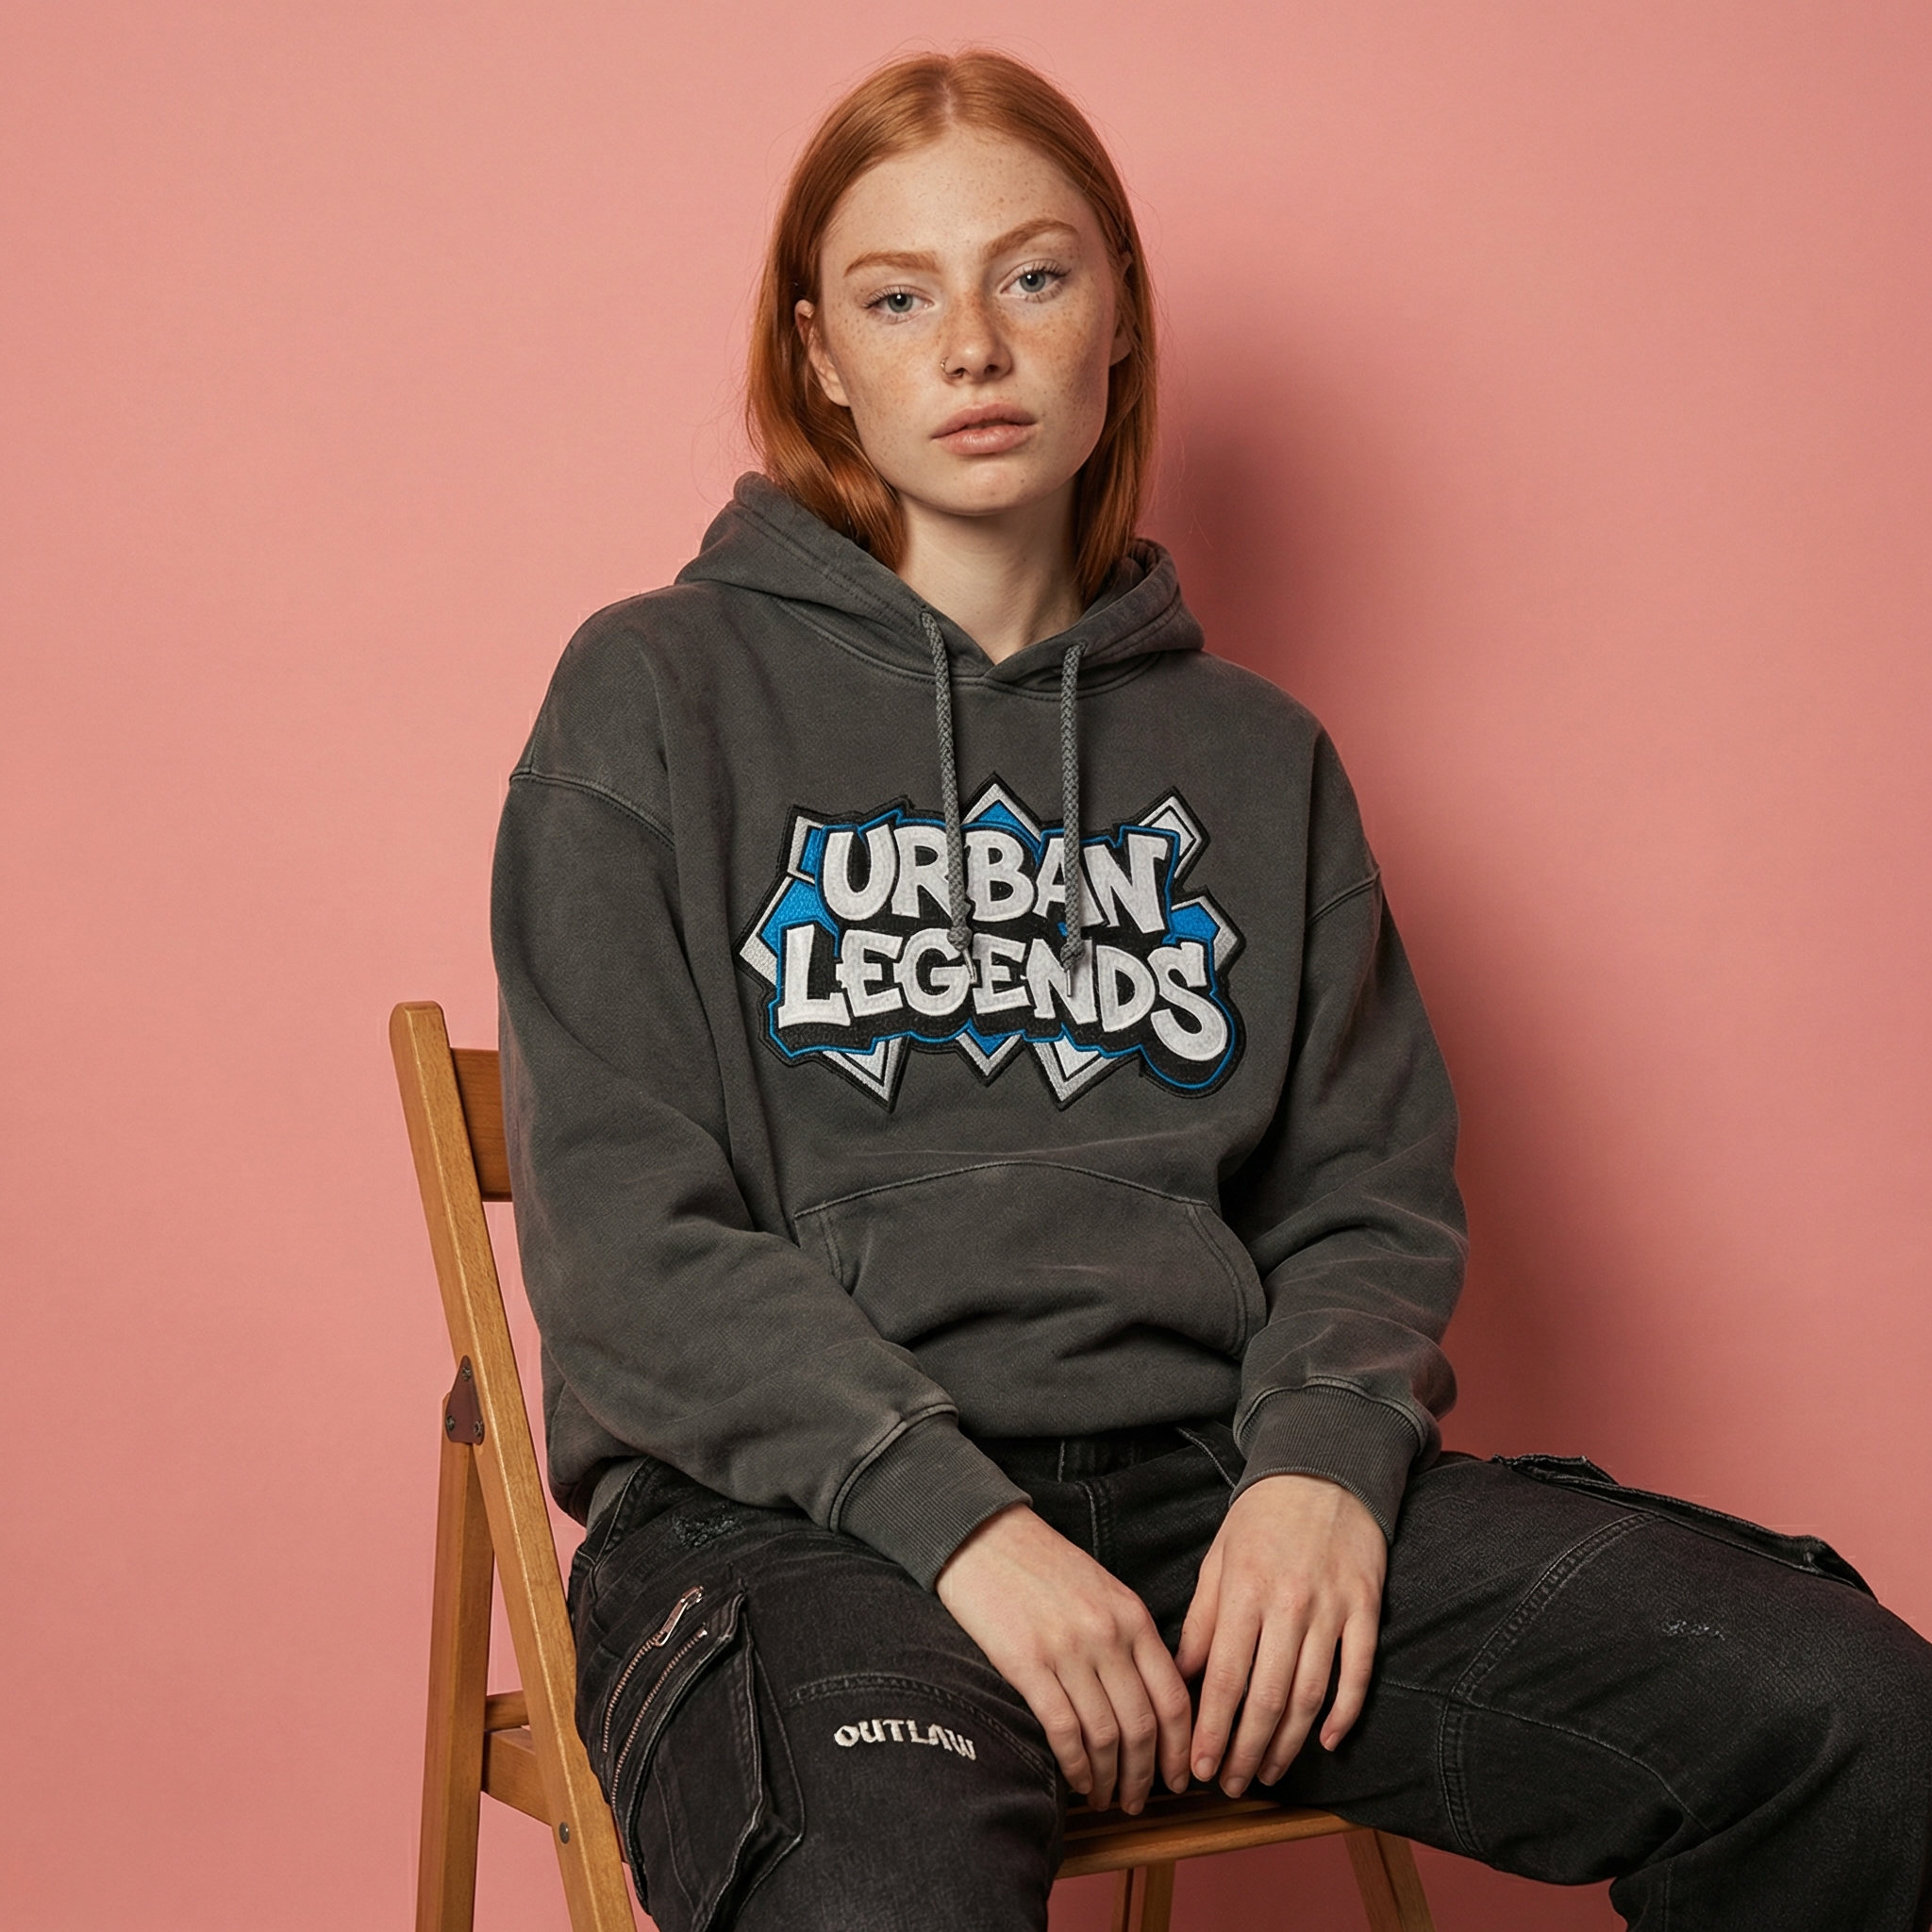
6. Original-scene seated crop, 1:1
style=virtual-try-on, pose=sitting, plan=medium-shot, ratio=1:1. The last result returns to the pink scene and seats the model on a wooden chair. The hoodie remains the focus, with natural-looking bunching around the elbows and lap. The crop again hides much of the footwear and lower trouser length. Pick it for a relaxed social or editorial frame, not as proof that a full outfit fits correctly while seated.
|
|
 |
Runtime, cost, and parameter notes
The six recorded runs took about 37s, 29s, 27s, 30s, 33s, and 36s respectively. These are observed elapsed times for this test set, not a service guarantee. The Wiro documentation lists the available controls and shows a separate example task completing in 6 seconds, but that example does not match this input or output configuration. It should not be used to estimate these runs.
No Wiro cost per output was retained with these six original test tasks, and the current model documentation does not publish a price for this configuration. Rather than invent a figure, this post reports no per-output cost. Teams that need a budget number should record the cost returned by their own completed task alongside its selected settings.
Which setting to pick
- Keep the original context: use
virtual-try-onwith a wide shot. - Clean product presentation: use
studio; run a standing front view first, then a side-profile candidate. - Feature a top or accessory: use
indoorplusmedium-shot, knowing lower-body items may not appear. - Build a hero or lookbook panel: use
outdoorand16:9. - Test pose-dependent drape: use
sittingas a visual direction, then check garment-critical results manually.
Virtual try-on research has long treated garment-to-person alignment as a hard problem; the VITON-HD open-source repository is useful background on high-resolution image-based try-on. These six outputs are presentation tests, not measurement or fit validation.
Related reading
- Seedream V5 Lite Image Editing: 7 Real Before and After Tests
- Before and After: 3 Product Photo Edits for Swimwear and Lingerie
- AI Image Resizing in 2026: 3 Best Models That Avoid Crops
Run the same inputs on Virtual Try-On V2 when a project needs a controlled visual direction. For ecommerce use, treat generated images as creative assets and keep product measurements, material claims, and final compliance checks outside the generation workflow.